Tools Toolbar - Left Toolbar
The tools toolbar of Marvin JS consists of the icons below. Click the name of an icon to jump to the relevant section of the document.
| Selection Tools | Delete Tool | Bond tools | Chain | Charge | Charge | S-group | Smart R-group | R-group Attachment | Reaction Tools | Electron Flow Arrow | Radical and Lone Pair | Graphical Boxes | Text |
|---|---|---|---|---|---|---|---|---|---|---|---|---|---|
Selection Tools
The default tool is the Rectangle selection. Another type of selection can be chosen from a sub-menu, after clicking on the black triangle in the lower-right corner of the button. With Rectangle selection, you can select rectangle-shaped areas. Every structure and object inside the rectangle will be selected.
| Selection symbol | Selection type |
|---|---|
| Rectangle selection | |
| Freehand selection |
An atom or a bond can be selected by clicking on it with either of the selection tools. Double-clicking on the structure (or object) selects the whole structure, in this case, the bond gets selected along with the connected atoms. If you want to select a bond without its atoms, you have to choose the Freehand selection and select the middle of the bond. Alternatively, press the Ctrl key and click on the bond while either of the selection tools is active.
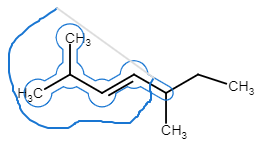
Select Structures with the Freehand Selection Tool
- Select the Freehand selection tool.
- Drag the cursor until the gray line sweeps over the structure.
- The selected structure gets a blue highlight.
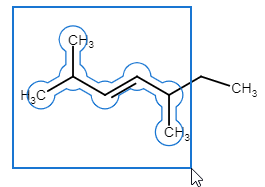
Select Structures with the Rectangle Selection Tool
Select the Rectangle selection tool.
Drag the cursor until the rectangle includes every part of the structure you would like to select.
When you release the left mouse button, the selected structure gets a blue highlight.
Delete Tool
Erases structures from the canvas.
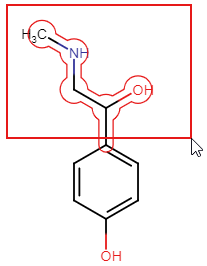
Deleting a Structure
Choose the Delete tool and drag diagonally until a red highlight appears on the structure you want to erase. When you release the left mouse button, the highlighted parts will be deleted. You can erase an atom or a bond by selecting the Delete tool and clicking on it.
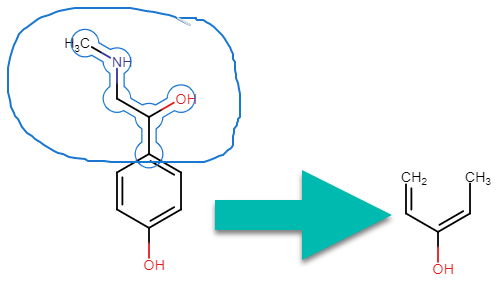
Deleting a Structure with the Rectangle or Freehand Selection Tool
Make a selection, then delete it by clicking on the Delete tool or pressing the Delete button on the keyboard. In the case of deleting a bond, its atoms will not disappear from the canvas. On the other hand, if you erase an atom, its bonds will also be deleted.
Bond Tools
The default bond tool is the Single bond tool. The other types of bonds can be selected from a sub-menu, after clicking on the black triangle in the lower-right corner of the button. You can also use keyboard shortcuts to choose a bond type to connect two atoms or alter an already existing bond. See the complete list of chemical bonds available in Marvin JS and their respective keyboard shortcuts in the table below.
| Bond symbol | Bond type | Shortcut |
|---|---|---|
| Drawing | Ctrl+D | |
| Single bond | 1 | |
| Double bond | 2 | |
| Triple bond | 3 | |
| Aromatic bond | 4 | |
| Single Up wedge bond | 5 | |
| Single Down wedge bond | 6 | |
| Single Up or Down query bond | 7 | |
| Double Cis or Trans query bond | N/A | |
| Double C/T or Unspecified query bond | N/A | |
| Single or Double query bond | 12 | |
 |
Single or Aromatic query bond | 14 |
| Double or Aromatic query bond | 24 | |
| Any query bond | 0 | |
| Coordinate bond | N/A | |
| Position variation bond | N/A |
Chain
Draw an alkyl or conjugated chain with arbitrary length.
Draw a Chain
After selecting the Chain button you can draw the alkyl chain by dragging or clicking repeatedly on the starting atom. The length of the chain is shown on the tip of the cursor. During drawing, the new chain can be rotated around its starting atom to the desired orientation by dragging.

You can create a conjugated polyene chain by holding down the Ctrl button when chain-drawing.
Increase Charge
Increases the charge of an atom by one unit with each click, that is, adds a positive charge to the atom.
Decrease Charge
Decreases the charge of an atom by one unit with each click, that is, adds a negative charge to the atom.
S-group
Opens the S-group dialog to establish repeating units, SRU polymers, link nodes, or copolymers.
Create an S-group
- Select the S-group tool, then select the structure you would like to group.
- The S-group dialog opens.
- Select the repetition pattern and specify the label value, then click OK.
- The S-group is created.

Smart R-group
The Smart R-group tool can be used to draws R-group labels, creates R-group definitions, and open the R-group dialog window, where the labels can be changed.
Drawing R-group Labels
Select the Smart R-group tool. Click on a clear place on the canvas, or on the right place in the molecule (sprout drawing is also possible). In this case, the default setting is that the auto numbering is active, which means that R1, R2, and so on, groups will automatically appear in the place of the clicking in the right order.

By default, the tool puts the R1 label first, then automatically increases the number. The R-group count depends on the already finished R-group definitions. The default settings can be changed in the R-group dialog window.
Creating R-group Definitions
Selecting with the Smart R-group tool results that the R-group label will be given to the fragment (or fragments), which appears on the canvas. When there is more than one R-group in the scaffold, the label of the fragment will get the smallest R-group number, which has not got a definition yet.
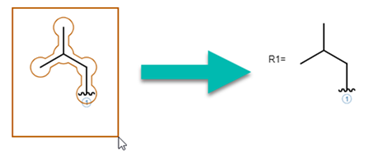
Similarly to the case of the R-group labels, the default setting is that the tool puts the R1 label first, then automatically increases the number. The R-group count depends on the R-group labels in the scaffold molecule.
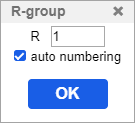
To change the R-group label settings, select the R-group tool, then left-click on the label you would like to change. In the R-group dialog window, you can change the R-group count and turn off the autonumbering.
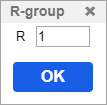
To change the label of a definition, select the R-group tool, then left-click on the definition-label you would like to change. In the R-group dialog window, you can change the label.
R-group Attachment
Adds an R-group attachment point to an atom. Select the R-group attachment point button and then click on the atom. You can add more attachment points by clicking successively on the selected atoms.

Reaction Tools
The default tool is the Straight arrow. Other arrow types can be selected from a sub-menu, after clicking on the black triangle in the lower-right corner of the button.
It is also a multifunctional tool, that draws graphical arrows, reaction operators, for example, + sign and arrow, and maps the atoms in the reaction.
| Reaction arrow symbol | Reaction arrow type |
|---|---|
| Straight arrow | |
| Two-headed arrow (Resonance arrow.) | |
| Equilibrium arrow |
To place a + sign on the canvas, select the Reaction tool, then left-click on the canvas where you would like to place the + sign.
To place a reaction arrow on the canvas, select the Reaction tool, then drag with it on the canvas where you would like to place the arrow. During the dragging, gray feedback shows the position of the newly forming arrow. Release the button to create the arrow.
If it is necessary the length and the direction of the arrow can be changed afterward.

Select the smart Reaction tool from the tools toolbar, then press the left mouse button on the atom you would like to map, and drag to the other atom, which receives the same map number. (Golden brown feedback helps the process.) After releasing the mouse button, the atom map number appears on the lower-right corner of the selected atoms.

Electron Flow Arrow
The default electron flow arrow is the Electron flow double arrow. The other types of arrows can be selected from a sub-menu, after clicking on the black triangle in the lower-right corner of the button.
| Electron flow arrow symbol | Electron flow arrow type |
|---|---|
| Electron flow single arrow | |
| Electron flow double arrow |
Draw an Electron Flow Arrow from an Atom to an Atom
- Select the preferred type of electron flow arrow button.
- Drag the electron flow arrow from the electrons to the target atom or bond. A feedback of the arrow appears.

{primary} Drawing electron flow arrows starting from lone pairs is only possible when the lone pair visibility is turned on in View settings.
Radical and Lone Pair
The default tool is the Increase radical, which assigns radical electrons to an atom.
The Increase lone pair tool can be selected after clicking on the black triangle in the lower-right corner of the button.
| Symbol | Tool |
|---|---|
| Increase radical | |
| Increase lone pair |
Assign a Radical Electron to an Atom
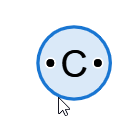
Set radicals manually with the Increase radical button on the Tools toolbar. With successive clicking on the atom, you can increase the number of the radical electrons until four. For the fifth click, all of the unpaired electrons will be removed.
Graphical Boxes
The default graphical object is the Rectangle. The other types of graphical objects can be selected from a sub-menu, after clicking on the black triangle in the lower-right corner of the button.
| Graphical object symbol | Graphical object name |
|---|---|
| Rectangle | |
| Ellipse |
Drawing Graphical Objects
To draw a shape, choose the Rectangle or Ellipse, then drag the mouse cursor until the shape reaches the desired size. Gray feedback shows what the box will look like.
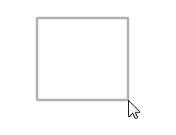
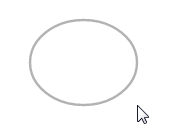
The size, shape, and color of the object can be changed afterward as well. For more information, see Graphical objects.
Text
Opens the Text dialog, where text and symbols can be added to the canvas.
To write on the canvas, select the Text tool, then left-click on an empty place on the canvas. In the opening Text dialog, you can create and format the text.